Your document photo ready in minutes
Choose the document, frame the face and download it at the right size. Everything runs in your browser — no account and no photo upload.
Free · No sign-up · Nothing is uploaded
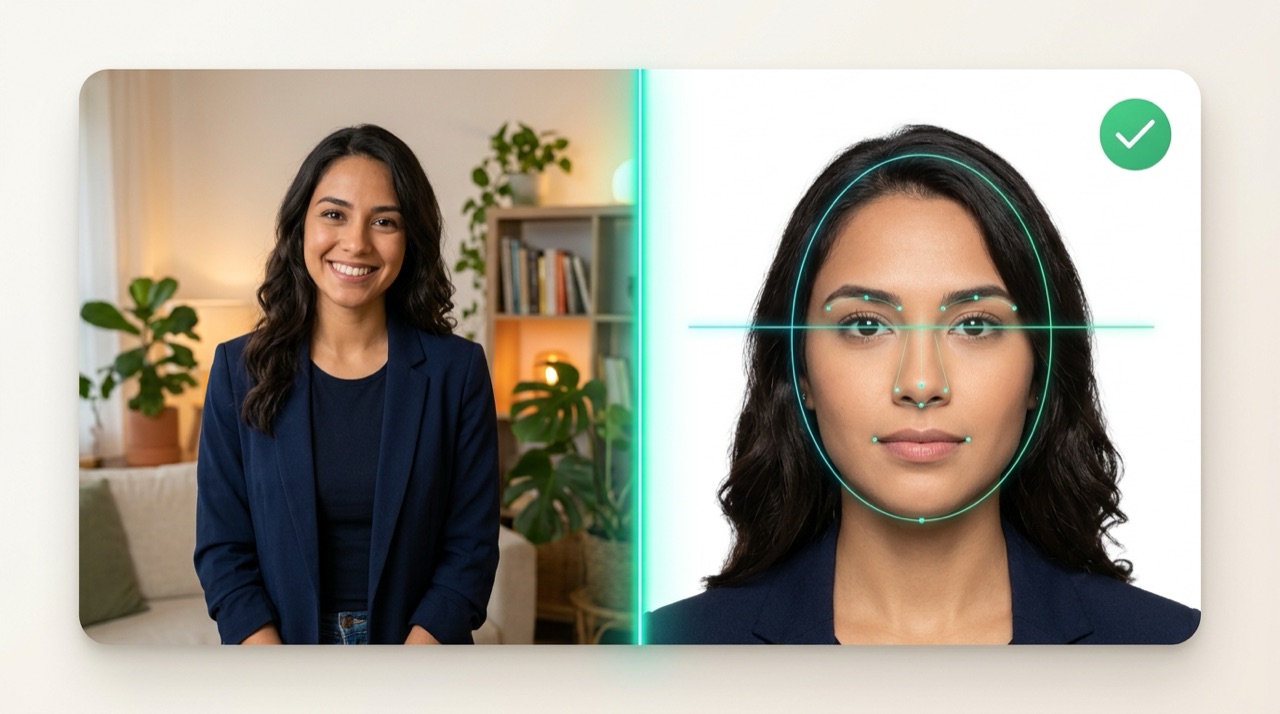
Selected document
Brazil — 3 × 4 photo
- Photo size
- 30 × 40 mm
- 300 DPI
- 354 × 472 px
- Recommended background:
- white
How it works
Three steps, no sign-up
From phone to printed photo in under two minutes.
- 01 · 18 official country presets
Brazil
30 × 40 mm
Brazilian passport
30 × 40 mm
USA
2 × 2 in
Schengen / EU
35 × 45 mm
1Choose the document
Brazil 3×4, US 2×2, Schengen 35×45, Canada 50×70 and more. The app applies sizes, file limits and background rules.
-
02 · Crown, eye-line & chin guides 2
Frame and review
Use the live camera or a photo. Adjust framing with the guides and check the preview, dimensions and JPEG file size.
-
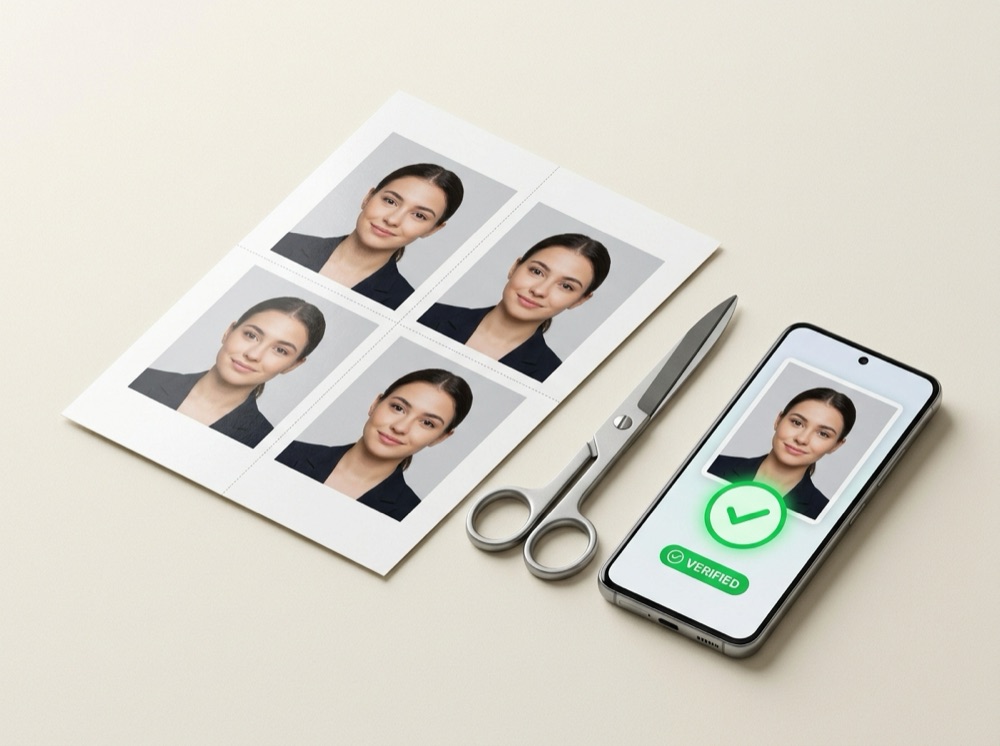 03 · 300 DPI JPEG + 4×6 / A4 print sheet 3
Download or print
Download the 300 DPI JPEG or a 10×15/A4 sheet. Documents that require an original photo automatically lock filters and background replacement.
By the numbers
Transparent from start to finish
- passports, visas and IDs with official sizes
- 18
- photos uploaded to servers
- 0
- DPI in the final JPEG, ready to print
- 300
- to download and print — no watermark
- $0
Documents
Most requested photos — Brazil
Every document has its own size, background and file limit. Open the official rule or start right away.
-
Brazil — 3 × 4 photo
30 × 40 mm · Recommended background: white
-
Brazilian passport — 3 × 4
30 × 40 mm · Recommended background: white
-
5 × 7 cm photo
50 × 70 mm · Recommended background: white
-
USA — 2 × 2 in
2 × 2 in (51 × 51 mm) · Recommended background: white
-
USA — Green Card / DV Lottery
2 × 2 in (600 × 600 px) · Recommended background: white
-
Schengen / EU — 35 × 45 mm
35 × 45 mm · Recommended background: white / light gray
-
Portugal — 35 × 45 mm
35 × 45 mm · Recommended background: white / light gray
-
Spain — DNI / Passport (26 × 32 mm)
26 × 32 mm · Recommended background: white
-
United Kingdom — 35 × 45 mm
35 × 45 mm · Recommended background: white / light gray
-
Latin America — ID 3 × 4
30 × 40 mm · Recommended background: white
-
Latin America — Carnet 4 × 4
40 × 40 mm · Recommended background: white
-
Mexico — Passport (35 × 45 mm)
35 × 45 mm · Recommended background: white
-
Argentina — DNI / Passport (4 × 4 cm)
40 × 40 mm · Recommended background: white
-
Colombia — ID & Visa (3 × 4 cm)
30 × 40 mm · Recommended background: white
-
Canada — Passport (50 × 70 mm)
50 × 70 mm · Recommended background: white
-
Canada — Visitor / Study Visa (35 × 45 mm)
35 × 45 mm · Recommended background: white
-
Japan — Passport / Visa (35 × 45 mm)
35 × 45 mm · Recommended background: white / light gray
-
ICAO standard — 35 × 45 mm
35 × 45 mm · Recommended background: white / light gray
Quick Visual Guide
Get approved on the first try — no manuals needed
See at a glance what consular systems approve and what triggers instant rejection.
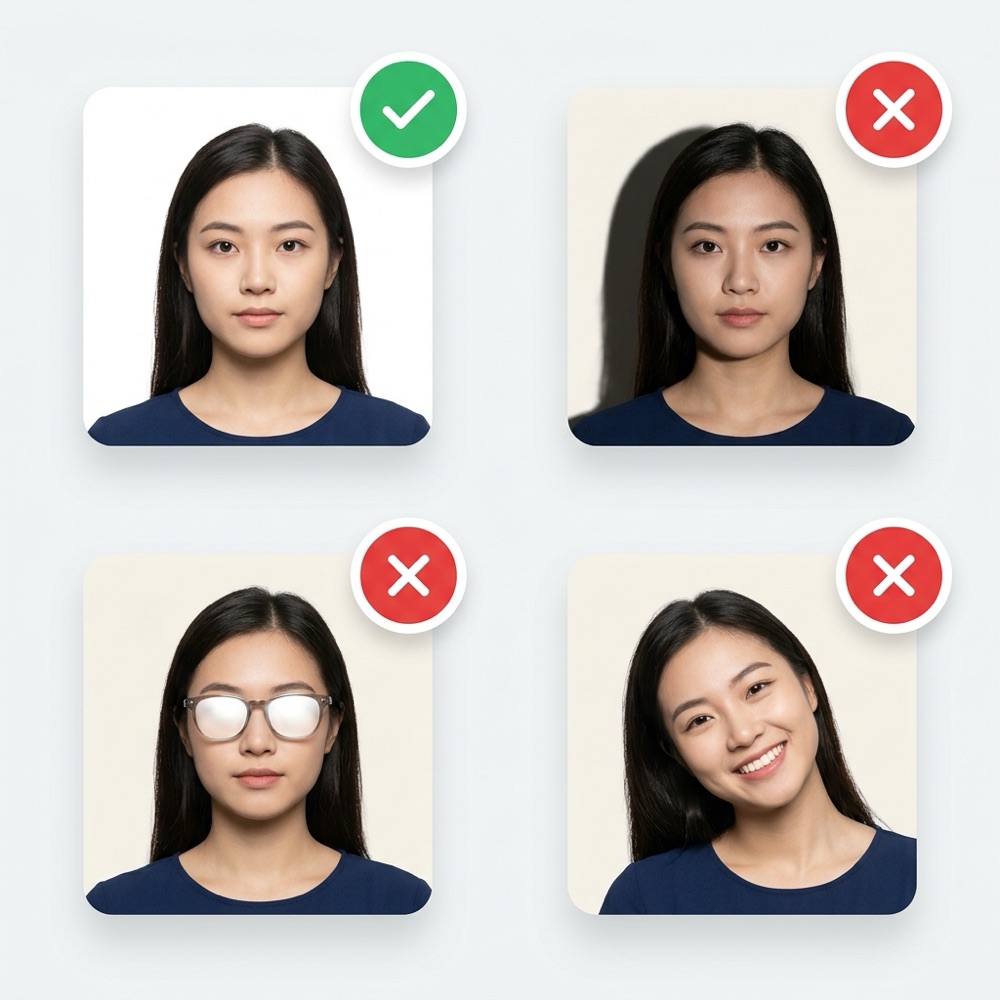
Approved (✓) vs. Common mistakes (✕)
- Front-facing, even daylight & plain background
- Harsh dark shadow behind the head
- Bright flash or window glare on glasses
- Tilted head or wide open smile
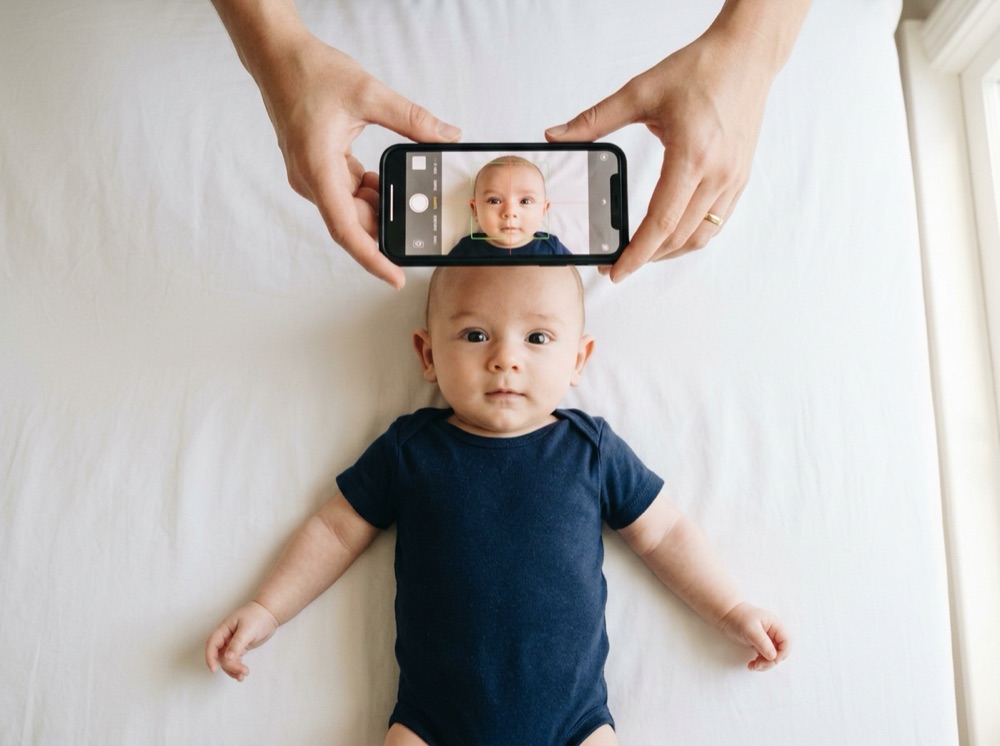
The flat white-sheet method (overhead shot)
Lay your baby on a smooth white sheet near a window in a dark top and shoot straight down with no supporting hands visible.
Read baby photo guide →Complete guide
Passport, visa and ID photo rules
A rejected photo can delay a passport, a visa or even a driver’s licence renewal. The rules below summarise what official bodies require and explain how to get it right the first time. They follow ICAO Doc 9303 and each country’s public guidance — always confirm the latest version on the authority’s website before submitting.
Sizes by document
Summary of the sizes applied by the app. The issuing authority makes the final decision — always check the official source.
| Document | Size | Pixels | Background | File |
|---|---|---|---|---|
| Brazil — 3 × 4 photo 30 × 40 mm · 354 × 472 px | 30 × 40 mm | 354 × 472 | white | ≤ 500 KB |
| Brazilian passport — 3 × 4 30 × 40 mm · 354 × 472 px | 30 × 40 mm | 354 × 472 | white | ≤ 500 KB |
| 5 × 7 cm photo 50 × 70 mm · 591 × 827 px | 50 × 70 mm | 591 × 827 | white | ≤ 2 MB |
| USA — 2 × 2 in 2 × 2 in (51 × 51 mm) · 600 × 600 px | 2 × 2 in (51 × 51 mm) | 600 × 600 | white | ≤ 240 KB |
| USA — Green Card / DV Lottery 2 × 2 in (600 × 600 px) · 600 × 600 px | 2 × 2 in (600 × 600 px) | 600 × 600 | white | ≤ 240 KB |
| Schengen / EU — 35 × 45 mm 35 × 45 mm · 413 × 531 px | 35 × 45 mm | 413 × 531 | white / light gray | ≤ 500 KB |
| Portugal — 35 × 45 mm 35 × 45 mm · 413 × 531 px | 35 × 45 mm | 413 × 531 | white / light gray | ≤ 500 KB |
| Spain — DNI / Passport (26 × 32 mm) 26 × 32 mm · 307 × 378 px | 26 × 32 mm | 307 × 378 | white | ≤ 500 KB |
| United Kingdom — 35 × 45 mm 35 × 45 mm · 413 × 531 px | 35 × 45 mm | 413 × 531 | white / light gray | ≤ 500 KB |
| Latin America — ID 3 × 4 30 × 40 mm · 354 × 472 px | 30 × 40 mm | 354 × 472 | white | ≤ 500 KB |
| Latin America — Carnet 4 × 4 40 × 40 mm · 472 × 472 px | 40 × 40 mm | 472 × 472 | white | ≤ 500 KB |
| Mexico — Passport (35 × 45 mm) 35 × 45 mm · 413 × 531 px | 35 × 45 mm | 413 × 531 | white | ≤ 500 KB |
| Argentina — DNI / Passport (4 × 4 cm) 40 × 40 mm · 472 × 472 px | 40 × 40 mm | 472 × 472 | white | ≤ 500 KB |
| Colombia — ID & Visa (3 × 4 cm) 30 × 40 mm · 354 × 472 px | 30 × 40 mm | 354 × 472 | white | ≤ 300 KB |
| Canada — Passport (50 × 70 mm) 50 × 70 mm · 591 × 827 px | 50 × 70 mm | 591 × 827 | white | ≤ 2 MB |
| Canada — Visitor / Study Visa (35 × 45 mm) 35 × 45 mm · 420 × 540 px | 35 × 45 mm | 420 × 540 | white | ≤ 4 MB |
| Japan — Passport / Visa (35 × 45 mm) 35 × 45 mm · 413 × 531 px | 35 × 45 mm | 413 × 531 | white / light gray | ≤ 500 KB |
| ICAO standard — 35 × 45 mm 35 × 45 mm · 413 × 531 px | 35 × 45 mm | 413 × 531 | white / light gray | ≤ 500 KB |
01 What almost every official photo needs
Every ID photo must identify you without ambiguity: full face, open eyes, neutral expression and nothing between the camera and your face. Most countries follow ICAO 9303, which standardises proportions and image quality.
In practice that means a recent colour photo (usually no older than six months), facing the camera, with a plain light background, no hard shadows and no editing that changes your features.
- Face centred, looking at the camera
- Neutral expression, mouth closed, eyes visible
- No sunglasses, cap or hat
- No filters, beauty retouching or smile
02 Framing: eyes, chin and top of the head
Framing is the detail that gets the most photos rejected. The head should fill most of the frame without cropping the top of the hair or the chin. The eye line must sit in a specific band — for a US passport, for example, between 56% and 69% of the height, measured from the bottom.
The editor’s oval guide shows where the head should sit. Dashed lines mark the eye band, the crown and the chin. Adjust zoom and drag until the face fits; the final photo is exactly what you see inside the crop frame.
- Whole head visible, with space above the hair
- Shoulders visible at the bottom of the frame
- Eyes at the height shown by the guides
- No cropped ears or chin
03 Light and background: what affects acceptance most
Prefer soft, indirect daylight facing you. A window in the morning is usually enough; avoid direct sun, a strong flash and lamps behind your head, which cast shadows on the face and background.
The background should be plain and light — white or light gray, depending on the document. A smooth wall one metre behind you works better than a wall right behind your head. If you have no neutral wall, the app’s automatic cutout helps, but the result is better when the photo was already taken against a clean background.
- Evenly lit face, no hard shadows
- White, light gray or very light blue background
- No objects, pictures or people behind you
- No backlight (window behind you)
04 Clothing, hair, glasses and accessories
Dark clothing contrasts with a light background and clearly defines the shoulders. Avoid tops in the same colour as the background. Long hair can be worn loose as long as it does not cover the eyes, eyebrows or the contour of the face.
Prescription glasses are accepted in some countries only without glare and with no frame over the eyes; when in doubt, take them off. Caps, hats, headscarves (unless documented for religious reasons) and headphones are usually refused. For babies and small children, support the head and shoot when the eyes are open — the photo can be taken with the baby lying on a white surface, shot from above.
- Dark clothes, no large patterns
- No glasses, cap or headphones
- Hair away from the eyes and eyebrows
- Babies: eyes open, mouth closed, no toys in view
05 From phone to paper: printing at the right size
Use the digital photo in the online form. For an in-person application, download the print sheet: it already contains 2–8 copies at the exact size with dotted cut guides. Choose 10×15 cm for standard photo paper or A4 for a print shop.
The critical part is printing at 100% (actual size), without “fit to page” or “fill the page”. Glossy or matte photo paper keeps details sharp; plain paper absorbs ink and can smear. Check with a ruler that the photo measures the right millimetres before cutting.
- Print at 100%, no automatic scaling
- Use photo paper of 180 g/m² or heavier
- Cut along the dotted lines with straight scissors
- Do not fold the photo: creases show in scanners
06 Most common reasons for rejection
Rejections usually come from easy-to-fix details: a shadow behind the head, a gradient background, a slightly tilted face, a smile, hair covering an eyebrow, an old photo or low resolution. Images with filters, heavy HDR, motion blur and crops that cut the top of the head are also refused.
Before downloading, check the preview at actual size and inspect the face closely. The app warns you when your photo has less resolution than 300 DPI requires — use a larger image instead of accepting the warning.
- Tilted face or face outside the guides
- Mottled or shadowed background
- Blurry photo or filter
- Resolution below 300 DPI
07 Privacy and technology
Unlike services that upload your selfie to a server, PassPhotoFree uses Canvas and Web Workers inside your browser. Your photo is read from the local file, processed in device memory and never leaves it. There is no upload, no account and no cloud storage.
That also makes it fast: cropping, adjustments and compression happen instantly, even on slow connections. The site loads only its own files and measurement/ad tags (with photo areas masked and manual opt-out available on the Privacy page).
Checklist before you submit
- The correct document is selected
- Plain, even background
- Eyes on the guide and the whole head in frame
- Neutral expression and open eyes
- No glasses, hat or filters
- File within the size limit
- Printed at 100% and cut along the guides
Practical troubleshooting guides
View all guides → U.S. Visa & Passport · Form DS-160 U.S. Visa Photo Rejected on DS-160: How to Fix 600×600 Pixels, White Background & 240 KB Limit True-Scale Printing · 300 DPI How to Print Passport & ID Photos on 4×6 in (10×15 cm) or A4 Paper Without Losing Scale Baby & Infant Guide · Shadow-Free Method How to Take a Baby or Newborn Passport & Visa Photo at Home (White Sheet Method) 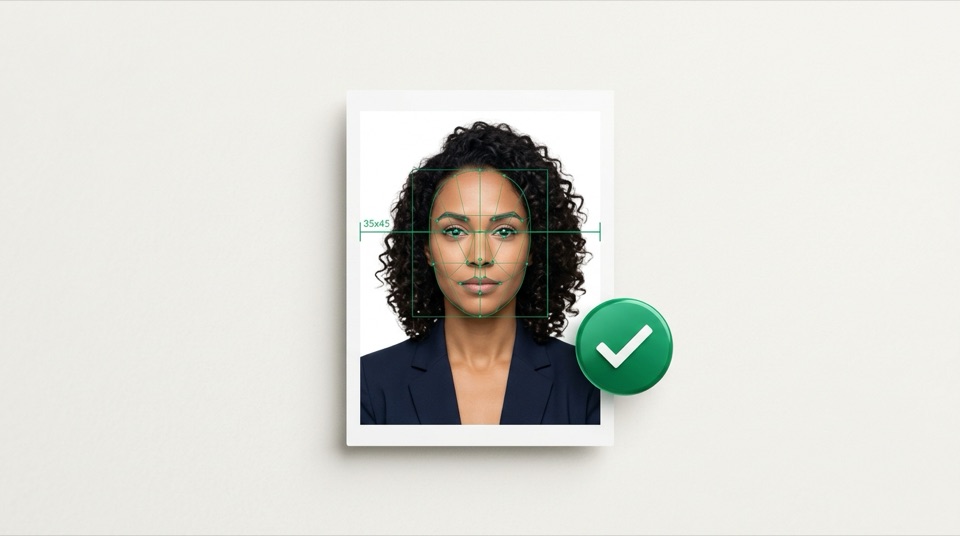 Federal Police & Consulates · Brazil Brazilian Passport vs. Standard 3×4 Photo: Federal Police & e-Consular Rules Explained ICAO 9303 Biometric Rules · Country Comparison Can You Wear Glasses, a Beard, Earrings or Makeup in a Passport or Visa Photo? (U.S., UK, EU, Canada & Brazil)
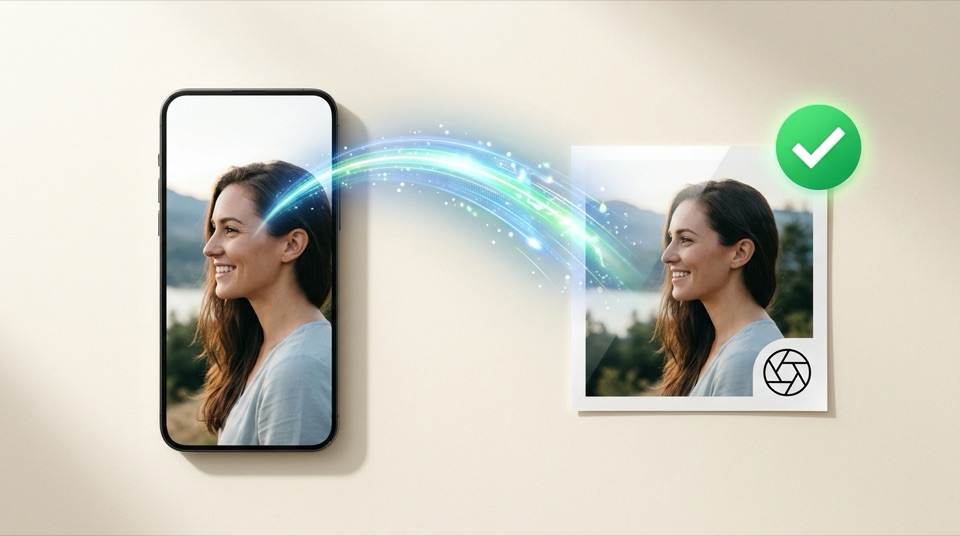 File Format & Resolution · iPhone HEIC to 300 DPI JPEG iPhone HEIC Photo Not Accepted on Government Forms: How to Convert to a 300 DPI JPEG in Your Browser
Official sources
- Brazilian Federal Police — passport
- U.S. Department of State — photo requirements
- Canada.ca — passport photos
- ICAO Doc 9303 (international standard)
- European Commission — visa policy
This guide is informational and does not replace the issuing authority’s instructions. Sizes, file limits and background rules can change without notice.
FAQ
Questions about ID photos
Short answers to the most common questions before you submit your photo.
Will this photo be accepted for a Brazilian passport, US visa and Schengen visa?
The tool applies the sizes, proportions and file limits published by those authorities, including the ICAO standard. For a Brazilian passport, choose the specific “Brazilian passport” preset; the generic 3×4 option is for ID cards, driver’s licences and other documents. Final acceptance always rests with the consulate or issuing body. Check the preview at actual size, read the official rules and avoid edits that change your features.
Is my photo uploaded to a server?
No. Upload, cropping, background, adjustments and compression all happen in your browser with Canvas and Web Workers. Your image is never transmitted or stored. See the Privacy Policy for details.
Can I take the photo with my phone?
Yes. Face a window, hold the phone at eye level and use the rear camera. Ask someone to hold it or use a support. Avoid flash, digital zoom and backlight. An arm’s-length selfie can distort the face — prefer the rear camera and a little distance.
Do I need a white background?
Brazil, the US and Canada ask for a white or near-white background. Schengen accepts white or light gray. The tool offers both and tries to cut out the background automatically, but the result is better when the photo was already taken against a plain, well-lit wall.
Can I wear glasses, a cap or a hat?
For most documents, no. Prescription glasses are only accepted without glare and with no frame over the eyes, and several countries already ban them. Caps, hats, headphones and headscarves (unless documented for religious reasons) are usually refused.
What is the difference between the digital photo and the print sheet?
The digital photo is a JPEG at the exact document size with 300 DPI, ready for the online form. The print sheet is a 10×15 cm or A4 page with 2–8 copies and cut guides, for an in-person application or a print shop.
How do I print the sheet at the right size?
Choose 100% or “actual size” in the print dialog and turn off “fit to page”. Use photo paper and cut along the dotted lines. If your printer cannot print borderless, increase the margin slightly in the preview and check with a ruler afterwards.
Is it really free? How do you make money?
Yes, it is free and needs no account. The site is supported by ads shown in the sidebar and just above the download button. Because processing happens on your device, there is no server cost per photo — and your image stays private.
Your photo ready in under two minutes
No sign-up, no payment and no image sent to anyone. Choose your document and start.
Choose documentPhoto editor
Your photo in three steps
- 1 Document
- 2 Photo
- 3 Review & download
Choose your document
Size, alignment and file limit adjust automatically.
Suggested for Brazil
- Photo size
- 30 × 40 mm
- 300 DPI
- 354 × 472 px
- Recommended background
- white
- Use
- Digital + print
Requirement & Official source
Requirement: White background and neutral face. For a passport, choose “Brazilian passport”.
Upload your photo
Face the camera in good light, face clearly visible. JPG, PNG or WebP.
Your photo is processed in the browser. Nothing is uploaded.
Frame your face
Drag to move. Pinch (or scroll) to zoom. Line up your eyes with the dashed line.
Fine adjustments Brightness, contrast and background
Review & download
Check the JPEG dimensions and file size, then download the file or print sheet.
- Dimensions
- 354 × 472
- JPEG size
- —
- DPI
- 300
- Effective print resolution
- —
Checked by the app
- ✓Exact document dimensions
- ✓File size limit
- ✓300 DPI in the JPEG
- ✓No filters or background replacement
Check in your photo
- ○Even lighting, no harsh shadows
- ○Eyes visible and open
- ○Neutral expression, mouth closed
- ○Head and shoulders framed
Upload a photo to enable the download.
The 10×15/A4 sheet is optional. The full-scale PDF with a 50 mm calibration line is planned for the next stage.
Your photo is processed in the browser. Nothing is uploaded. · 300 DPI · JPEG